Wednesday, December 10, 2014

50 Ways to Paint A Nautilus

"She said to me 
The answer is easy if you 
Take it logically
I'd like to help you in your struggle 
To be free
There must be fifty ways..."
  ~ Paul Simon


An early attempt at a still life with nautilus.

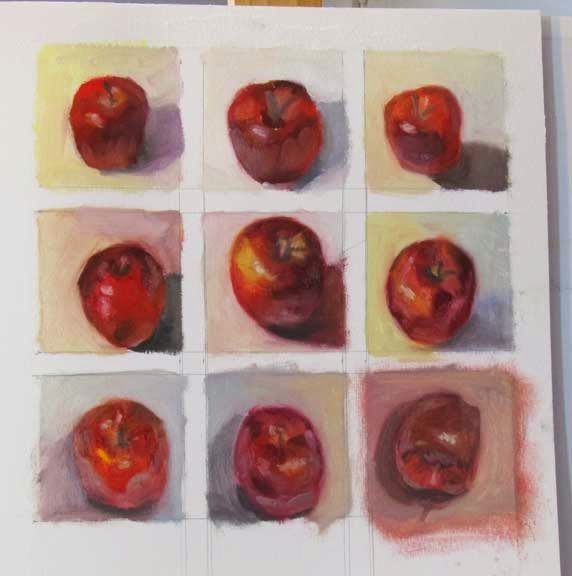
Beautifully rendered paintings don't happen overnight. So many beginners (and some more advanced artists) give up on art because of the overwhelming frustration of not being able to produce what they see in their heads. It is incredibly discouraging when it doesn't go right, when you start to question why in the world you are torturing yourself like this. Good art takes practice, perseverance, and many many mistakes. Typically we don't get to see the mistakes of other artists though, only the final perfect piece which looks dishearteningly effortless. I think this adds to the unrealistic expectations we have of ourselves. So I'm going to share a whole series of abandoned and what I would consider sub-par paintings that I've done while attempting to render a particular subject to my liking.

You may remember my slight obsession with the seashells that my father-in-law gave me this summer, particularly a beautiful chambered nautilus. It sits in a place of honor in my studio and often calls me to draw and paint it. It turns out a nautilus is a challenging shape to render. It's not a circle, yet the brain - or at least my brain - keeps jumping to conclusions and I find myself constantly having to reevaluate the shape as I paint. This leads to overworking the painting and making the edges of the shell too hard; then the shell either ends up looking flat or like a cut-out.

Attempting the stripes on the shell

And then there are those darn stripes! The painting above had potential, but I got intimidated by the stripes and quit. The stripes have to follow the shape of the shell, not only in direction, but in value and color saturation to match the shell's curvature and shadow. If the shadow part of the stripe doesn't match the shadow part of the shell, it won't make sense to the eye. Eeek! I was so nervous about messing up the stripes that my hand was shaking as I tried to paint them.


Another attempt at a still life with nautilus.

Here's another try at the stripes. Before I added the stripes the nautilus shell itself had pretty good form, but I didn't get the values right on the stripes as they curve and go into shadow.  Too many attempts to fix the problem muddied the colors and created too many sharp edges and the shell ended up looking fairly flat.

I got some very helpful critiques from other artists and what they said made sense; I just couldn't seem to put their advice into practice. At that point, I just wanted to abandon painting the nautilus. I painted many other subjects in-between, but that nautilus mocked me every time I went into my studio. It would catch my eye as I painted other things. It fascinated me and called to me. I wanted to paint it so badly! Maybe I needed to take a deep breath and approach this in a different way; be logical about it, since I was so emotional about it. There's a reason all those Master painters did study after study of things, before they even started on a full-blown painting. And so I broke down and painted the nautilus again.

Nautilus study I
And again...

Nautilus study II
And again...

 
Nautilus study III

This last study, in which I took a deep breath and added the stripes, is the closest I've come to what I want, so far. I even managed to get that sense of mother-of-pearl on the interior of the shell. I now have hope that I can successfully include a nautilus in a painting after all. There are definitely things I can still do to improve it, but that thrill of accomplishment, the sense of victory after so many defeats, is a bit intoxicating and probably is what drives us to do this crazy thing called art in the first place.

Sunday, November 30, 2014

Sketching From Life

"It is only by drawing often, drawing everything, drawing incessantly, that one fine day you discover to your surprise that you have rendered something in its true character."
                                                                                     ~ Camille Pissarro


5 minute sketches done with Pigma Micron brush pen

In the last six months or so, it seems like I've been suffering more from writer's block than artist's block. Occasionally inspiration will strike, but more often that not I sit down to blog and just stare at the screen wondering what to say. So this post is going to be made up of random thoughts about some sketching I've done recently.

Our local art center has a weekly live model session that I've been taking advantage of. I much prefer the quick sketches rather than the long poses. Having only a few minutes to draw helps to prioritize what to draw; I don't have time to become obsessive over picky little details.


5 minute and 20 minute sketches done with Pigma Micron brush pen


Watercolor sketches from the Tracy Aviary


I also love sketching at zoos, aquariums, and the like. It can be downright maddening when a place is crowded; people stepping in front of you or bumping into you, and the noise level can become distracting, but if you can find an area where you are mostly alone, it's great. I've also had some wonderful conversations with people who were brave enough to risk interrupting my work to talk to me. I especially enjoy talking to kids, hoping that my example will encourage them to do art. 


Watercolor sketches done at a coffee shop

There are plenty of opportunities for me to sketch in everyday situations, not just classes or special trips. Although I felt a little self-conscious at first, I've learned to really enjoy sketching at coffee shops. Easy access to sweet hot beverages + doing art = bliss. Bonus points if the coffee shop has interesting mugs or tea pots to draw, as the one above did. 

I hope you enjoyed this little tour of my sketchbooks while my writing muse is off doing something else for a while. Hopefully she'll return soon.


Friday, November 07, 2014

Getting Out of Your Own Way

"The longer you look at an object, the more abstract it becomes, and, ironically, the more real."
                                                                                                                              ~ Lucian Freud


My Apple Phase
(although a lot of them could get stand-in parts as red peppers.)

As many of you know, I switched from painting with acrylics to oils this summer and that I am over the moon in love with my new medium, but in these first giddy months of our relationship we're still learning a lot about each other. That's why I ordered Carol Marine's new book Daily Painting. (I should note that much of this book could apply to any medium, but I was partially motivated to get the book due to the author's medium being oil.) It arrived on Tuesday, and I spent the rest of the afternoon totally engrossed in it. Wednesday I had some other obligations so further reading had to wait, but on Thursday I woke up early in anticipation of being able to devote the day to Daily Painting.

I decided to do an exercise in the book called Ten Minute Apples, in which you paint an apple 8 times*, but you only have 10 minutes to do each painting. The idea is to concentrate on values and form, and not fuss over every little detail. I had a shiny apple (and I mean really shiny. How much wax did they coat it with???) ready to go. I set up my palette and my lighting, had some energetic tunes playing** and I dove into the exercise. Then some interesting things started to happen.

What many of you may not know is that my undergraduate degree is in Psychology. I wanted to get a BFA, but that was not considered "practical" so I went with my other interest - why our brains do what they do. (Don't get me started on how unpractical a BA in Psychology is, but it was more acceptable than a BFA, so I did it and just took as many fine art electives as I could and spent the next 20 years feeling like an artist wannabe. Thank goodness for getting older and not caring so much about what other people think anymore. But I digress.) So I noted my mental state and what was happening on my canvas during the exercise with interest.

After about the third apple painting, part of my brain started screaming with boredom. "It's an apple. I get it already. Do we have to paint 6 more?" Then a funny thing happened. As I continued with the exercise that part of my brain checked out. And when it checked out, suddenly I was painting much more intuitively, my apples started to look more apple-like in a painterly way, I was making interesting color choices and figured out problems that had been baffling me on the previous 3 paintings and I wasn't rushing to finish in 10 minutes. Then on the 9th painting that part of my brain checked back in. I guess it had been secretly keeping track and knew this was the last painting. Sure enough, that painting was one of my weaker ones and I didn't finish before the timer went off. Fascinating...


Apple #5 - or the apple that said "apple"


Apple #7 - or the apple in which I finally figured out that
the waxy sheen on the bottom half of the apple was light blue


Those of you who are familiar with Betty Edwards' book Drawing on the Right Side of the Brain might find this scenario reminiscent of her descriptions about the shift from left brain to right brain. It sure reminded me of that. Whether or not that's truly what was happening in my brain I don't know, but I found the Ten Minute Apples exercise very useful. I feel more confident in my mixing and handling of oil paints. And although the stated purpose of this particular exercise itself did not include tapping into a more creative way of painting, the take-home message I got from the exercise (and from the whole book) is that a lot of the roadblocks I run into with painting can be solved by me just getting out of my own way and allowing myself to experiment, explore, and play without worrying about the results. I can definitely see myself doing this exercise over and over, although that one part of my brain may get pretty sick of apples. 

*My canvas divided up evenly for 9 paintings, so I did an extra one.

**I am rather partial to Rodrigo y Gabriela in the studio. Upbeat classical guitar with no lyrics to distract me. 

Thursday, October 23, 2014

Lessons from the Field

"I'm still learning that there are no mistakes, only discoveries."
                                                                                                    ~ Fernando Ferreira de Araujo


We've been blessed with a long, beautiful Fall this year and I am trying to get out and paint in the field as much as possible. Yesterday I packed up my supplies and headed to a state park near us and spent the day painting on location. I found that the park had thoughtfully supplied me with plenty of convenient picnic tables near scenic views. A good thing, since I have yet to get an outdoor easel. 

I spent the morning at this lovely spot next to the river. A single loon kept me company, floating and diving in the river right around my vicinity. It called once; that hauntingly beautiful wild call that nature sounds relaxation CDs have made so cliched. 


I also spotted a coyote wandering around in the rocks and scrubby junipers across the river from me (too far away for a picture). The paint flowed from my brush onto the canvas almost effortlessly. I was brimming with contentment. If only I could do this every day!

After lunch, I scouted out some other spots with painting potential and ended up being inspired by this group of boulders in the afternoon light. The rocks were a dream to paint, with delicious purples and rust colors. 


My models. They were wonderful at holding a pose for a long time.

As I drove home, I was so proud of the little paintings I had done and so filled with bliss from the day. I unloaded the car and put my pieces in a prominent spot where my husband couldn't miss them when he walked in the door. 

After I unpacked everything, I glanced at my paintings again and did a double take. They looked nothing like what I'd done in the field! The colors were very pale and washed out, the values in the boulder painting were flat. What the...? Oh, crushing disappointment! I was so tempted to hide the paintings, but I bravely showed them to my husband anyway. He was supportive (of course) and we discussed what might've gone wrong. Best we could figure, my eyes were tricked by the intensity of the light. After a little research on the internet, I found that this is a common problem for beginning plein air painters. Suggestions ranged from getting an umbrella, to turning so that your canvas and palette are in the shade, to toning your canvas so that you aren't staring at a blindingly white surface while trying to figure out colors and values. 


What happened to all the yellow ochre and earth tones I thought I used? Why is this SO green?

We also thought that perhaps wearing sunglasses had affected my perception of the scene, but last week I did another painting with sunglasses on and it came out just fine. Maybe I should name that piece "Beginner's Luck".


Beginner's luck

Today it is overcast and blustery, so I can stay inside with a cup of tea and contemplate the challenges of painting on location, as well as fritter away more time surfing the internet trying to decide which of the hundreds of plein air painting set-ups I should get. So many choices: Pochade box or French easel style? Traditional easel legs or tripod? The wooden set-ups are so beautiful, but also way more expensive. The metal ones seem more compact for carrying, and more rugged for outdoor terrain, but they are not lovely. The internet is also full of artists with DIY pochade box instructions (just google "make your own pochade box" and you'll see what I mean). If you have any experience with outdoor painting, please leave your opinion on a potential easel in the comments section for me. You can also tease me about my newbie mistakes in the field. Thanks!
 

Tuesday, October 14, 2014

Maine Coast Work-In-Progress

"All life is an experiment. The more experiments you make, the better."
                                                                                                 ~ Ralph Waldo Emerson


6" x 6" oil study for Lifting Fog

As I've said before, I am head-over-heels in love with oil paints. So far, it seems like anything I did in acrylic, I can do better in oil. How long the honeymoon will last I don't know, but wow I'm enjoying this!

The other day I ran across a photo I had taken years ago on the coast of Maine. I immediately wanted to try painting it and so I did a little 6" x 6" painting as an experiment. I was happy enough with the outcome to decide to work it into a bigger painting. At the urging of a friend, I had gotten a 12" x 12" cradled panel to try (Ampersand 2" deep cradled Gessobord, to be exact), and have been waiting for the perfect subject to paint on it. This seemed like as good a subject as any.


Initial paint layers

I really like the golden tones in the initial study, but the coast had an almost reddish color to the rocks so I played that up in this painting. I also wanted to make sure the trees in the background were not as dark as in my study. I wanted to push them back farther into the painting, and also have a little hint of water vapor in the air around them as the fog burned off.

The lovely easel that is displaying my work-in-progress in these photos was an anniversary gift from my husband this year. Sorry Marilyn, but art supplies are this girl's best friend!  

More progress

While the first layers of paint on this piece dry, I've been taking advantage of the beautiful fall weather we've been having and getting out and doing more plein air painting. We live in what is considered a high desert region and the oil paints are holding up to the dry air and strong sun admirably. As soon as I can get good lighting for photos, I'll post some of my little in-the-field paintings.

Monday, September 22, 2014

Plein Air Painting

"To look, to see, to understand, to capture - however imperfectly - is to be part of the land in a way like no other."
                                                                                                    ~ Jan Blencowe

Jeanne MacKenzie demonstrating how to paint en plein air.

I've just returned home from my annual trip to the Susan K. Black Foundation Workshop in Dubois, Wyoming. To be surrounded by such beauty and to get to spend every day with so many other artists was fantastic as always. 

Three years ago I tried plein air (from the French, meaning "open air") painting with the group, but my acrylic paints dried out the second I put them on the palette. This year I decided to try plein air painting again, since I now paint in oils. I was much more successful this time around! 

Jeanne Mackenzie led the plein air instruction at the workshop and spent a whole day walking us beginners through the process. One of the exercises she had us do was to work from photographs while outside. This allowed us to get a feel for the equipment and how the paint reacted to the elements without having to also worry about distractions like the constantly changing light. I also got some practice in typical plein air activities such as rescuing paintings after they get blown over, and picking insects and bits of plant matter from the paint.


First attempt from a photo


Second attempt from a photo

(I don't know who took the photos I worked from, so I'm sorry I can't give proper credit)


My first attempt in the field.

The next day we traveled about 10 miles out of town and Jeanne let us loose in the field - literally. There were cows grazing nearby to add to the ambiance. It was a beautiful sunny day with some fall color in the grasses and the distant trees. The wind was even kind enough to be gentle. I was thrilled with my first attempt at plein air painting - it actually looks like something!


My second attempt in the field.

The clouds had taken over on the day we headed up into the mountains. I found a lovely scene of a mountain stream flowing below some craggy peaks. I was surprised to see the painting come out so dull because in reality the colors around me were quite bright. I was so excited by the experience that I sometimes forgot to clean off my brushes; that may have contributed to the dull colors. I learned that many plein air painters have two of each kind of brush - one for light colors and one for dark colors - to minimize this problem. I also learned that I need a lot more practice with painting water!


Aspen showing off.

As we drove back to the conference center for lunch, the sun finally decided to come out. It lit up a stunning grove of aspen in peak fall color. There was even a convenient turn-out on the highway so we could stop and take pictures, but we didn't have time to get out our paints. Two days later I passed this same spot on my way home and was surprised to see the color in the leaves completely changed to a dull yellowish-brown. Fall is very short in the mountains!

I hope to do more plein air painting here at home as I really enjoyed the experience. I found it very satisfying to paint from a scene right in front of me rather than working from a photograph. My love affair with oil paints is also still red hot and I'm anxious to paint with them any chance I get. Plein air gives me a good excuse!


Sunday, September 07, 2014

Abstract Painting

"Abstraction demands more from me than realism. Instead of reproducing something outside of me, now I go inward and use everything I've learned thus far in my life."
                                                                                                        ~ Susan Avishai


For those of you who have been on the edge of your seats waiting to hear what my next big adventure is: it's been delayed. Again. And yes, I'm frustrated. 

Moving on.

I took two workshops along with my classes at the Pennsylvania Academy of the Fine Arts this summer. One of them was an abstract painting workshop taught by Kassem Amoudi (who also teaches at the Woodmere Art Museum, the Main Line Art Center, and the Wayne Art Center for those of you in the Philadelphia area who might be interested.) I've never tried abstract painting before and was excited to stretch myself in a different direction.


We started out with a blank canvas and were instructed to make random charcoal marks on it. We used acrylic gel medium to seal the charcoal so it would not smudge during the next steps.


Thin washes of color were randomly applied to areas of the charcoal.


Thicker areas of color were added.


I tried adding some splatters, with mixed results.


I was trying to bring out shapes that I saw in the painting as it developed.


Further refining the shapes and color blocks. I was encouraged to enhance the areas that looked like figures. I saw one area that looked like a dog, but once I developed it I didn't like it, so I covered it over.


At this point, Mr. Amoudi recommended I stop painting. Knowing that I tend to overwork things, I listened to him and put the paintbrushes down.

Considering this was my first experience with abstract painting, I'm actually pretty pleased with the result. It was exhausting though. Everyone in the workshop was mentally fried by the end of the day. I had never really thought about it before, but it is much harder to make something out of nothing than to paint what's in front of you. And it is especially hard to avoid making what we were all referring to as "bad motel art".

Here are a few artists that I really like whose work is either abstract or includes abstract elements: 
Brian Rutenberg 
Dafila Scott
Ewoud De Groot

I think I'd like to explore abstract painting further... after a long rest.


Thursday, August 21, 2014

More Etching And A Little Woodblock Printing

"The true method of knowledge is experiment."
                                                 ~ William Blake


I think the worst thing about going away is when you come back and settle into your old life it's as if you never left. Except for all the unpacking we've yet to get through, being home is making me feel like this summer in Philadelphia never happened. Luckily, I've got all the new knowledge and artwork to prove to myself that it did happen.

During the last two weeks of my printmaking class at the Pennsylvania Academy of the Fine Arts, we worked independently on whichever printmaking methods we wanted. I knew I wanted to experiment more with etching, particularly the inking process to see what different effects I could get. I played with multiple colors of ink and on some of the prints I took a Q-Tip and wiped away the ink in certain areas to try to get a highlight effect on the shells.


We also worked with woodblock printing, which I liked very much. I had assumed that carving into wood would be harder than carving into a linoleum block, but I was surprised at how easily it carved. I was also intrigued by the idea of brushing the wood with a wire brush to bring out and print the wood grain along with the carved image.


This barred owl image was a lot of fun to carve. I then inked the block with two different colors - black on the owl and a very dark blue on the sky. As you can see, the inks ended up looking pretty much the same. Overall though, I felt this woodblock print was successful enough to whet my interest in more experimenting at home.

Back in the Spring, I had hinted that there were multiple big adventures coming up for me. My time at PAFA this summer was just the start. Things are about to get really busy around here...

Thursday, July 31, 2014

Hummingbirds


Dinner on the wing

I had promised you hummingbird pictures this summer, but I've discovered that ruby-throated hummingbirds, or at least the ones at my father-in-law's place, are very camera shy. The female hummingbird seems a little less concerned about my presence than the male, so I managed to get a few decent photos of her from a respectful distance. The male, however, is very nervous and will even scold me if I'm on the far end of his flightpath to the feeder. I only managed to get this one blurry shot of him through the kitchen window, but at least his gorget was brilliant. 

 
All that sugar makes for a very high-strung bird

There seems to be just one male and one female hummingbird here. There could be other individuals that I'm not able to differentiate from each other, but since I've never seen any battles between two males or two females, I'm guessing there's just one of each. If the male catches the female at the feeder, he will chase her away. I find this interesting because where we live, rufous hummingbird females will chase away the males. Male and female hummingbirds will only associate with each other to mate, otherwise they are very antagonistic towards each other.


Pen & ink drawing of some hummingbird nestlings

I found this old pen & ink drawing I did years ago of some nestling hummingbirds. Unfortunately I can't remember what species they were. My cousins had a cabin in northern Idaho and a hummingbird built a nest and raised two babies right outside their window. We were lucky enough to visit just a few days before the babies fledged. The tiny delicate nest made of lichens, moss, and spider webs was a marvel of engineering.

I'm being lazy today and not including a quote with this post. I hope you'll forgive me.

Tuesday, July 15, 2014

Adventures in Intaglio Printmaking

"I don't like to say I have given my life to art. I prefer to say art has given me my life."
                                                                                                                  ~ Frank Stella


Finished print on drying rack

One of the classes I'm taking this summer is a printmaking class. Printmaking has always fascinated me, but I've only had the chance to dabble in linoleum block printing and that was a few years ago, so I jumped at the opportunity to explore printmaking more.

Currently we are making intaglio (pronounced in-tahl-yo) prints, an Italian word for etchings or engravings which in its essence means "to cut into". In a nutshell, an image is cut into a copper or zinc plate, ink is applied and then cleaned off, leaving a residue in the cut areas. When damp paper is placed on top of the plate and forced into these cut areas by the pressure of the printing press, the ink transfers onto the paper and creates a print of the image. If a plate is cut into by hand, the process is known as engraving. If the plate is cut into by acid, the process is known as etching. In my class, we're using acid! 

Here's the etching printmaking process, step-by-step. You may recognize the image I'm etching from a shell drawing in a previous post.

Ready to begin the etching process!
A jig is made to keep the plate from moving when I transfer the drawing onto it.


Rolling on the acid resist.
 The whole plate is covered in asphaltum; an acid-resistant substance made from tar.


A printmaking sandwich.
The asphaltum-covered plate is returned to the jig, a piece of plain newsprint is placed over the plate and the drawing is traced on top of that.


The first reveal.
The pressure of tracing the drawing transfers the asphaltum onto the newsprint, which gives you a rough idea of what the final print may look like. Wherever there is asphaltum on the plate, the acid can't reach the zinc and that part of the print will remain blank. Where the asphaltum is removed, the acid will eat away at the plate, creating an area where ink will collect. You have to be careful when handling the plate because it's very easy to accidentally touch the asphaltum and end up with a fingerprint etched into your plate!


The acid bath is in an enclosed booth with ventilation and glass shields.
I donned safety goggles, long thick protective gloves, and a big protective apron before heading to the acid bath. My plate luxuriated in the acid bath for about 6 or 7 minutes. Once the plate comes out of the acid bath, it is important to wash off any acid residue so you don't accidentally get any on yourself.


The post-bath plate
It doesn't look like anything has happened to the plate at this stage...


The squeaky-clean plate
...but when the asphaltum is cleaned off, you can see where the acid ate into the exposed parts of the plate, leaving an etched image.


Inked and ready
 Ink is applied all over the plate and then wiped off, only leaving ink in the etched lines.


The amount of pressure this press can generate is mind-boggling
The plate is placed image-side up on a printing press, damp paper is placed over the plate, and big thick felt and wool "blankets" are placed on top to protect both the plate and the roller when the whole thing is run through the press.


The big reveal!
The final step is the "reveal" - the moment you get to see what all that work produced! There's a buzz of excitement in my class every time someone pulls their print off the plate because you really don't know exactly what it's going to look like. My first print was a little too stark, so when I inked the plate the second time, I didn't clean it off quite so thoroughly and got a nice faint tone in the background. If I wanted to, I could also reapply asphaltum to the plate and add more details, run it through the acid bath and try printing it again.

I'm really enjoying intaglio printmaking, but obviously this is not something I'd do in my home studio. Somehow I don't think our landlord would be too keen on the whole acid bath thing.